Thursday, December 31, 2009

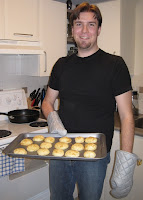
Baked Brie x 2

So I've made two different baked brie's and I'm excited to tell you about both of them!

Sweet Chili Baked Brie
Ingredients:
Puff Pastry, thawed
Sweet Chili jelly
Pecans
A pack of Brie
1 egg. 

Method:
Preheat oven to 400F. Place some flour loosely on your working surface to prevent pastry stick. Use half a package of the puff pastry, rolling into a thin layer approx twice the diameter of the brie. Spread evenly the chili jelly in the center of the pastry. I used about a cup of jelly, but do it to taste.  Then sprinkled some crushed pecans on top of the jelly. Place the brie on top of the mixture.  At this point you could cut the edges of the pastry so it is all circular, but I just folded all the excess over the brie.  Brush the egg over the edges of the pastry and then flip it into a baking container. Brush the rest of the egg on the top. I then chose to top the dish with more pecans.  Bake for 25 minutes or until pastry is golden brown.

I took this to a wine & cheese party and it was the 'hit' cheese of the night, despite not remember a) what temperature to bake it at and b) having it cut into after removing it from the oven, rather than letting it sit.  Super big tip - bake this and let it sit at least 45 minutes. Also, bake it in a dish roughly the same size and shape as the brie to prevent excess overflow (as the cheese will be melted).


Cranberry Brie
Ingredients:
Puff Pastry
Cranberry Jam
Almonds & Pecans
Brie
Egg


Method:
Same as above except substituting the cranberry jam for the chili jelly and adding some almonds in.


Tips: Make sure the brie you use is fresh and the flavour you like. The brie for the second one (cranberry) was past it's prime and a little sour. It was also probably a bit too big for the recipe - the pastry ended up being rather thin when stretched out over it all.


I personally preferred the first one, but will happily make both again in the future. Thanks to Campbells Kitchens for the idea, and my Aunt ('Mumtina Child') for some inspiration...

Chana Massala Challenge

The Challenge: cook enough chana massala for 10 people.
The Issue: converting a recipe... (MATH!!!!!!)
The Result: mixed and salty.

The extended family were over at my parents house this year for Christmas and we'd planned a non-traditional feast for Boxing Day: Curry Dinner. Due to many factors, we ended up eating this meal a few days later, but that didn't really affect anything, as I prepared my dish in advance.


Now, those who know me know that math is definitely not my strong suit. The recipe called for 200g of chick peas, and the cans I was using only listed information in ml or fluid oz... so I had to figure out how to convert it all and (even using a calculater), it took a really long time. Eventually I worked out that I had to multiply everything in the recipe by a factor of 8. This is not an easy task...  And I fully admit that after doing all the hard work, I ended up NOT using 8 x 1 teaspoon of salt, or 8 x 800ml of water...  so I was learning on the fly.  I also discovered the fun reaction of water and baking soda... ooohh bubbles.. rising bubbles... spilling over bubbles....ahhh!!!!!

The recipe itself is already in my blog - see the side-bar and go to October 2009...

The outcome.. well, it took forever to get the water to boil off. I introduced the dish as thrice-boiled chana massala, as it had literally been boiled on three separate occasions to try remove the water. ugh. And then, much to my dismay, the dish was incredible salty. Crazy salty.  I asked for help in this department as I had no idea how to remove salt from a dish... my aunt suggested I add apricot jam. Fortunately we had some, and the entire can of it was plunked into the dish. This did help, but it was still way too salty for my personal taste - others loved it...

All in all it was quite the learning exercise. I want to try make it again as a regular size batch, but might wait a while for the curry smell to disapate from the house!

Lemon Sugar Cookies

So this post is a 'Cooking with Friends' post, as I baked this while visiting Owen for a little Christmas celebration/ get together. And to be totally honest, he did most of the work, as he had never baked before (unless we are counting 'home-ec'.. are we??)... so I guess this is better known as a 'guest spot' on my blog or something...?

Anyway, these cookies are a fantastic discovery for anyone who likes things lemony.. I would recommend everyone try make them!  We had some 'technical difficulties' due to some missing ingredients and using a mixer which is probably, oh, 26 years old...(?), but the next time these are made I'm sure they'll be perfect! Owen found the recipe online, and when I get a hard copy of it I shall source it here.

Lemon Sugar Cookies
Ingredients:
2 3/4 cups flour
1 teaspoon baking soda
1/2 teaspoon baking powder
1/2 teaspoon salt
1 cup butter, softened
1 1/2 cups white sugar
1 egg
1/2 teaspoon vanilla extract
1 1/2 teaspoons lemon extract
zest of 1 lemon
1/2 cup granulated or raw sugar to roll the cookies in.

Method:
Preheat oven to 350F, line cookie sheets with foil/parchment and spray with cookine oil/Pam.
Combine flour, baking powder, baking soda and salt in a bowl and set aside.
Zest the lemon and mix in with granulated sugar until sugar turns yellow-ish.
In a mixer combine butter and white sugar until smooth and fluffy (recipe says 3 - 5 minutes but took us way longer due to age of mixer and not softened butter). Then beat in egg, vanilla and lemon extracts.  Then gradually add the other dry ingredients until 'just moistened' (another area we got wrong...).
Roll about a tablespoon of dough into a round ball, then roll in the lemon/sugar mix to coat the exterior. Place each ball on the cookie sheet approx 2 inches apart.
Bake 8 - 10 minutes, then let stand for 2 minutes, and finally remove to cooking racks. Then, enjoy!

Our experience was slightly affected by not having baking soda or vanilla extract, so the cookies didn't 'spread' in the oven as they were supposed to. I would also recommend NOT using wax paper as your cookie sheet liner, as it seemed to, well, light on fire, or something... anyway..

And as these are fresh cookies, they should be consumed with in 3 days, as otherwise they go quite hard, and it's embarrassing serving them to guests.. ahem.. um.. yes... =P

Tuesday, December 22, 2009

Almond Squares - my favourite!

So I kind of sort of maybe totally polished off most of the first batch of almond squares Mum made, so it fell to me to replace the lot before Christmas arrived! Oh darn, now I know how to make this most delicious treat! mmmmmm!!!!!!!!!!!!!!

Almond Squares

Ingredients:
1 cup butter
1 cup sugar
2 cups flour
2 tsp almond flavouring
1 egg white

Method:
Mix ingredients by hand & pat into 8 inch square baking dish. Actually, I didn't do this by hand, I used the mixer, so you can too!  Sprinkle with caster (berry) sugar if you want. Bake at 350F for 45 minutes. Cut into small squares.

These are so yummy delicous amazing... thank you to an extended relation for giving Mum the recipe years ago!

Thursday, December 17, 2009

Tis the Season


'Tis the season for lots of cooking.. fa la la la la, la la la la...

rest assured there'll be lots of blogging... fa la la la la, la la la la...

ok ok, I'll stop...

But yes, I have cooking plans over the next week to 10 days, so will try update as things come out of the pan, pot or oven! :)

Monday, December 14, 2009

Shortbread

I made shortbread this past weekend as my contribution to a festive vampire-filled afternoon/evening. Making this was definitely a learning experience - I now fully understand the concept that some recipes need to be made a few days in advance for 'peak' tastes. I shall explain.

Mum found this shortbread recipe about 25 years ago in the Victoria Times Columnist. It was sent in by a lady named Margaret Giles of Colwood. I figure that if she had it published in a newspaper, it's a-ok to be up on my blog!

Shortbread
Ingredients:
2/3 cup icing sugar
1/2 pound butter (I feel like I'm channelling Julia Child with this one! "You can never have enough butter!")
2 1/2 cups all purpose flour.

Method:
Cream (whip like crazy) the butter and icing sugar until it is light and fluffy, then slowly add in the flour. I then patted and mushed it into the baking pan, but the recipe calls for you to roll it out to 1/4 inch and then cut into squares. I suppose you could also use cookie cutters here.

With Mum's oven we had to bake it at 350F for 45 minutes. The recipe says 320F for 30 - 35 min, so experiment at your leisure.  It wants it to be lightly browned.

Results:
Well, I baked this about an hour before leaving for my afternoon event and didn't know at the time that shortbread is best served a day or two after it has made. Something about 'settling' and becoming more moist. The general comments from the tasters was that they tasted good but were dry. Some suggested more practice and less flour.  The leftovers, however, were quite good over the next few days, so I think I'll stick with this recipe and just remember to make in advance!

Monday, December 7, 2009

Hummus

After a few weeks of organization I have finally made hummus!  This recipe is a mash up of a number of recipes I found or recieved... I don't know why I felt compelled to do that, but I just did... next time I wont, as I'm not skilled enough to be creative!!

Hummus
Ingredients:
1 can of chickpeas (mine was 540ml, which is approx 18 oz)
5 tablespoons of lemon juice
2 tablespoons of tahini
3 cloves of garlic
dash of salt
3 tablespoons of olive oil
dash of cayenne pepper

Method:
Drain chickpeas. Put everything in the food processor. Process.  Serve with pita or bread or crackers or whatever you like!

Thoughts: Well, I think I either put too much lemon juice or too much garlic as there is a slight 'sour' or 'sharp' tinge to the flavour. Pretty good otherwise. I think I may have used too much tahini too, as it smells quite 'peanutty' (which is strange at tahini is seasame paste)...

I think next time I'll go directly from a recipe given to me and will try alter the measurements to fit the 'full can' as opposed to 2/3 cup of chickpeas it currently calls for.

Friday, November 27, 2009

All Quiet on the Cooking Front

I haven't given up! I've just been doing some repeats and doing silly things like studying law and spending time with friends...

I have plans to cook more, perhaps this weekend...

Update: My plans were thwarted twice - once by not being able to get hold of a recipe, and the other by not having proper ingredients once a substitute recipe was found! DOH!

I shall persevere.

Tuesday, November 17, 2009

Cheese Soup with Noodles

So on a lunch break a few weeks ago I saw an ad for Campbell's Kitchen online, where all sorts of recipes seemed easy and quick. So I acquired some of the ingredients and decided to give one a try. I figured I'd start simple. I'll list the recipe, and then give my review.

Baked Macaroni and Cheese
Need:
1 can (10 3/4 ounces) Campbell's® Condensed Cheddar Cheese Soup
1/2 soup can milk
1/8 teaspoon ground black pepper
1 1/2 cup corkscrew-shaped pasta, cooked and drained
1 tablespoon dry bread crumbs
2 teaspoon butter, melted

Method:
Stir the soup, milk, black pepper and pasta in a 1-quart baking dish.
Stir the bread crumbs and butter in a small bowl. Sprinkle the bread crumb mixture over the pasta mixture.
Bake at 400°F. for 20 minutes or until the pasta mixture is hot and bubbling.


Review:
Well, the best way I can describe it would be how I titled this post: cheese soup and noodles. It was literally that, with some crunchy breadcrumbs on top. And for the record, I did way more breadcrumbs than this recipe asked for - probably 5 or 6 tablespoons worth.  I think it needs more pasta, less soupy sauce.  Also a bit of spice or kick would potentially get rid of the overbearing 'soup' flavour... or maybe by adding some real cheese to it.

So basically I'm still on the look out for a good Mac and Cheese recipe that doesn't come from a Kraft box (not that KD is good anymore).

Update:
This is way better on day 2, via microwave... mmm leftovers...

Sunday, November 8, 2009

Scones

So my niece and nephew convinced their mum and dad to come for a visit yesterday... in preparation grandma and auntie (me) decided to make scones.


I can't tell you the scone recipe, but for those who are super curious/eager, it's in the 5 Roses cooking book.


So instead I'll just show photos of the progress!  The only 'error' I made was patting the dough too thin, so the scones didn't rise high enough. Otherwise they were good!


William, of course, slept through the whole process, but Sophia seemed quiet interested!

Maybe when they're a bit older I'll teach them?

Thursday, October 29, 2009

Texas Mince and Rice

Dinner tonight was a variation of a recipe found in a microwave cook book Mum owns. It's one of my favourites.

Texas Mince and Rice
Needed:
500g ground beef (mince)
2 tbsp chilli powder
1/4 tsp pepper
1 large can stewed tomatoes
1 large onion, thinly sliced
1 large green pepper, chopped
3/4 cup instant rice

Method:
Mix together in a large microwave casserole dish the mince, chilli powder and pepper. Cook in microwave for 7 minutes, stiring half way. Drain all the horrible fat.  Then add in all other ingredients. WARNING: stiring this concoction is a nightmare, so be careful! Also, a suggestion - add the canned tomatoes last and don't bother stiring them in, just leave them on top.  Cook again for 10 - 15 minutes, or until the onions and peppers have softened. Sit for 5 minutes (a good time to cook the accompanying veggies!)


It's a nicely flavoured easy dish and I'd reccomend it for sure!

My Tools


So I figured I'd put up some images of my tools - the recipe books I own. Some of these are traditional family recipe books, others I have been gifted, and other still I have simply bought. If a recipe comes from any of them, I will note it. So far most of my recipes have been from people's own creation.


First I'll show the Family cook books:
(Mum has bought me copies over the years!)

Five Roses
The Personality of Meat
Cook and Enjoy it

Then there are the books I've been gifted:

Favourite Farmhouse/ British Recipes from Aunt Marlene 


Mrs Beetons - a gift from Mum, but not a traditional one we use.
Slow Cooker Recipes from Colleen and Wilfried

Cooking for Friends, also from Colleen and Wilfried
(co-owned)


Mastering the Art of French Cooking - my most recent cookbook, given to me by Mum and Dad in efforts to encourage my cooking, and because we recently saw that movie Julie & Julia (after I'd started my blog)...

500 Low Carb Recipes -
I'd bought this one a few years back...the Guacamole comes from it!

 And one I'm sure we are all familiar with now day! =P


There are a few books I'd like to get my hands on, when the time comes... :

The Joy of Cooking - apparently I can't cook in North America without it...
Cooks Illustrated, Cooking for Two - apparently really user friendly.

Anyone else have suggestions of cook books they can't live without?


Saturday, October 24, 2009

Lemon Meringue Pie

Ta Dah!!! I have learned how to make one of the family favourites! Lemon Meringue!! And I have to say, it's the first really 'difficult' thing I've made so far and I did have a few 'bleep' moments with it, but I'm pleased I've made it. I'll have to do a repeat to be confident with it, but I'm pretty pleased with myself!

Lemon Meringue Pie
Need:
Crust
3/4 cup Graham Cracker crumbs
1/3 cup butter
1/4 cup sugar

Lemon
1 can condensed milk
125 ml lemon juice
rind of 1 lemon
2 egg yolks

Meringue
2 egg whites
1/8 cup sugar

Method:
Crust - melt the butter and mix together all ingredients, then press into pie dish.
Lemon: mix together ingredients until one texture (ie fully mixed). pour into pie crust.
Meringue - this is the HARD part. (ugh). So you shouldn't have any yolk traces in the egg whites. If you do, start again. and again. and again. (and save the failures for breakfast the next morning..). Once you've got just whites, beat. We used the mixer, had it on high, and walked away for about 15 minutes. When it's all white and frothy, slowly add sugar.  The meringue is done when it 'peaks' - ie it can make a point similar to a Dairy Queen ice-cream cone.  Pour it on top of the lemon. (note: meringue is notoriously difficult. don't use the pictures here as references, as mine fell very flat. ideally it's quite light and puffy. next time...)
Put in an 350F oven for 10 - 13 minutes or until slightly brown on top.
Then CHILL.

This last direction, well, we didn't do enough of. So a hint - if you are serving this at dinner, make it at breakfast, as it need quite a long time to chill and set.  Mine tasted good but looked like a melted droopy mess!!

Edit: I just remembered, I had to double the entire recipe to fit the 9inch dish, so you are warned! :)

Also: get out of my kitchen! =P

Guacamole

So when mum was at the grocery store the other day the produce manager gave her a bunch of avacadoes for free as they were on their last day of 'possible sale'. Concerned with the idea of having to eat so many, we brainstormed with what to do with them all and remembered the birthday meal we were going to prepare. I declared that I would try make guacamole.

I don't like guacamole, but I like cooking, and I know others like the green stuff, so I'd better learn! 

I found the recipe in my low carb cookbook and it seemed pretty easy. Mum did the 'taste testing' and declared it to be the best guacamole she's had.

Guacamole
Need:
4 ripe avacados
3 tablespoons of lime juice
1/4 teaspoon tabasco sauce
3 mushed garlic cloves
2 tablespoons sweet red onions
salt to taste (we put quite a bit in).

Method:
Pit avo's, mush in a dish with a fork.Add in all other ingredients. Mix a lot!

We chilled it before serving it simply because I made it so early.  People seemed to really like it, so I'll have to make it for 'non-family' sometime to get more feedback. It was super easy, which I like!

Repeats: Salsa and Bruchetta

Earlier this week I made some Salsa again to use up some extra onion left over from the potato bake. My ratios were quite different from the previous attempt (far less onion), and I preferred this mix. It still didn't taste exactly how I want it too, but it's an improvement. I'll look up some recipies to try figure out the differences.


Mum and I cooked for hours yesterday to celebrate my Dad's birthday. I was in charge of three dishes, one was the repeat of Bruchetta. I made it the same way as before, so no need for a description. The only slight variation was that there was more tomato on each piece than last time, which seemed to be a good thing. 


Monday, October 19, 2009

Potato Bake

This was exciting!!! This is one of my favourite recipies my Aunt Martina makes when I go visit them. I called her up yesterday and begged for the recipe. As what seems to be a bit of a running theme on my blog so far, this recipe is a 'created' one, so it can be played with as much as we want!

Potato Bake

Needed:
1 potato per person (at least)
1 onion
1 small container of cream (I think that means 250ml)
lots of grated cheese
salt & pepper
bread to make bread crumbs.

Method:
Slice potatoes thinly, approx 3-5mm thick. If pre-preparing, soak potatoes in water.
Slick onion thinly, as above.
Grease the bottom of a casserole dish
Create a layer of potaotes, followed by some salt and pepper
Create a layer of onion
repeat, finishing with a layer of potatoes.
Dump a 'liberal' amount of grated cheese on top of all this.
Sprinkle breadcrumbs on top of the cheese to make the top 'crispy'.
Pour in cream, either until container empty, or until 1/2 way up the casserole dish.
Bake in oven for approx 30 - 45 min.


Issues I had:
Well, I didn't know how hot to set the oven. Our oven is notoriously horrid, so we set it at 400F, and baked it for 45 minutes. This was definitely not nearly enough - the potatoes weren't fully cooked, neither was the onion. The breadcrumbs over-cooked and absorbed all the cheese.  It was a yummy dish, but not up to my memories.

Variations I plan:
1) removal/ reduction of onion. 
2) addition of more cheese layers
3) baking for longer time at lower temperatures
4) we'll see what else I can come up with!

I made too much last night, so will experiment with smaller potatoes sometime in the weeks to come. Fingers crossed!  Anyone have any cooking advice for how to improve?

Steak Marinade

So Dad is teaching me about steak marinades. Apparently there are a few different kinds:

1) the 'flavour' marinade like teriyaki, peppercorn, bbq etc,
2) the syrupy kind, which almost makes the steak 'sticky' on the outside..
3) the 'flavour enhancing' kind. this isn't designed to give a flavour distinct of the meat, it's supposed to make the meat taste more 'meaty'.

Last night we made option 3.  Now Dad makes things up has he goes, so this is all just estimates.

Steak Marinade
Don't buy the most expensive cuts of steak for marinades, as they are designed to 'soften' or 'break down' the meat. We used Sirloin Tip Marinading Steak.  The steak should be put in a pot/container where the liquid will cover the meat entirely. Soak for a minimum of 5 hours, but preferably overnight.

Mix together:
100 ml of balsamic vineager
100 ml red wine
50 ml olive oil
5 'healthy shakes' of wochester sauce
1 teaspoon of liquid bovril
2 teaspoons of garlic
1 teaspoon of mixed herbs
1 teaspoon of cayenne pepper
1 tablespoon of sugar

The outcome: pretty good. I mean, I think I perfer the 'adds a flavour' kind (number 1), but this was an interesting experiment and had pretty good results!

Friday, October 16, 2009

Old-School Brownies

Had a bit of a slow down recently with the cooking, for not particular reason.

The other night I was feeling blue, so I made myself some brownies. And I did it 'old-school'.. ie I cracked open a box of pre-made brownie mix, added 1/4 cup of water, oil, and an egg, and baked. And as usual with me, I underestimated my timing, so they didn't even turn out properly! sigh

Yep, that's called backsliding. Don't worry, it won't happen again... 

so ya, not even gonna bother with a photo.  Hopefully more cooking to come.

Monday, October 12, 2009

Salsa and Bruschetta again

So part of learning how to cook is having the ability to make things again, without help. So today I tried to re-create salsa I was taught how to make over a year ago, and then also tried to re-make the bruschetta. I had mixed results, but generally it was a positive experience.

Salsa
chopped and mixed: 1 onion, 4 roma tomatoes, 2 jalapenos, some garlic, cilantro, and lime juice.

Results - well, it didn't taste quite right. I tried adding more lime juice but that didn't fix it. I think I'll do less onion next time and maybe more jalapeno? I don't know. Advice anyone?


Bruschetta - repeat
So this was my attempt at re-creating the Bruschetta from earlier this month. There were a few changes - I had much larger bread slices (which was a good thing for layering), and store-bought pesto (which was also good as it had garlic!).

Results - pretty darn good. I had forgotten to 'flip' the bread at first, but once I remembered, everything seemed to go well. The only downer on using larger bread was that after a while it got a bit soggy... but part of that was due to my over catering.

So overall, today's cooking adventure was a success.